Walkthrough on Blog Creation - Part 2
Customizing your blog site
Now that your blog site is live, it is time to customize it to meet your taste.
Customization
Start off by changing the tab icon. Right now, when you visit your site, the tab icon is set to the default “W” for Wowchemy.
You can change it to whatever you like. If you already have an icon prepared for that, great. Otherwise, you can prep one within a few minutes. I wouldn’t invest too much time in designing a tab icon, since it is such a small part of the site. I, for example, simply took a screenshot of my initials written in Courier New.
For the icon to update correctly, your custom icon needs to be 512x512 pixels, and stored in assets/media within your project repo.
Content
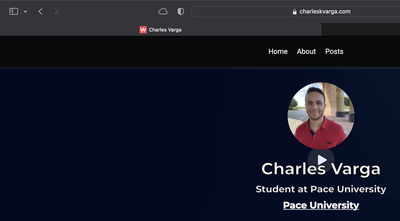
Next, shift your attention to the content/ directory in your repository. This is where you will write text that gets displayed on your site, including your introductory page. If you have not yet made any changes to the introductory page, then you still see information about Alice Bighetti. Change this page to match your information in content/authors/admin/_index.md. Furthermore, you will want to change avatar.jpg in that same directory to a picture of yourself.
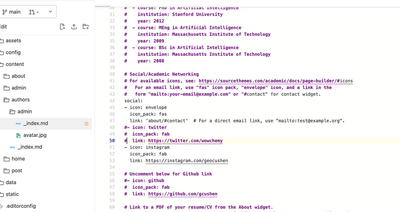
If you are familiar with Markdown, you may notice at this point that _index.md along with other Markdown files in the repository have YAML code at the top of the files. The reason for this is that the Hugo framework functions to standardize certain pages in your application without the need to learn an extensive amount of HTML, CSS, or JavaScript. The YAML in the Markdown serves to fill in fields that appear in certain types of pages. In the case of content/authors/admin/_index.md, you can start replacing Alice’s information with yours, making sure to avoid changing the keywords to the left of the colons in the YAML, and commenting out anything that doesn’t apply to you. For example, if you do not have a Twitter or don’t want that shown on your blog page, you can comment out the icon, icon_pack, and link lines corresponding to that under social.
Update Contact Form
If you visit the site on a web browser and click on the About page, you will notice that there is a contact form on there.
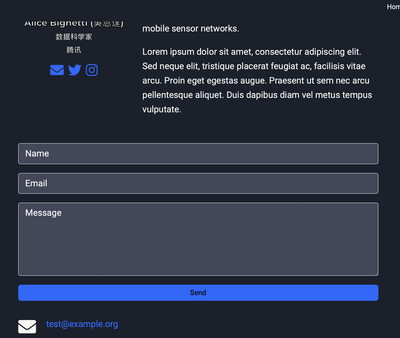
I personally don’t like the idea of a contact form along with an email address listed right beneath it; it’s redundant. As such, I personally eliminated the contact form from this page. To do so yourself, go to content/about/contact.md and comment out all the code under form:. If you prefer to keep this form as a means of communication on your site as opposed to your email address, you can do that too. In that case, you can simply remove your email address from the page by commenting out email: which is found in config/_default/params.yaml. Note that if you retain the contact form, correspondence will be sent to your Netlify admin panel instead of your email, and you may receive spam from people who input invalid email addresses such as satan@hell.org.
Congratulations, you have now customized the site so that it is 100% yours. In part 3, I will teach you how to create your first blog post.
Charles Varga
Cybersecurity Analyst at Florida Department of Financial Services
I am a cybersecurity professional working for the State of Florida and attending Pace University. My career interests include incident response, cybersecurity automation, pen testing, red teaming, and malware analysis.