Walkthrough on Blog Creation - Part 1
And why you too should create your own blog
I found it would be appropriate for me to make my first blog post on this site about how to create a blog site, especially because I intend to fill this blog with hacking tutorials along with write-ups on my experiences with new technologies. My experience in creating this site for myself– intended to exhibit my knowledge of cybersecurity– involved learning about tools I was not previously familiar with, namely Hugo and Netlify. Whether you are also starting off your career in cybersecurity like me or working elsewhere in computer science or IT, a blog serves multiple purposes, each of which are beneficial both to you and the tech community. If you’ve ever found yourself banging your head against a brick wall for days before you finally figured out how to get something to work properly, such as a Python library or a Golang module, you’re not alone. Documenting your endeavors in a public blog helps you retain the knowledge you gained from trying to accomplish a goal, in case you need it again in the future. Furthermore, it increases your visibility and therefore boosts your reputation in the tech community. Documenting your thought process for completing a challenge or implementing a program demonstrates to prospective employers that you are capable of taking what you learn and applying it to various different situations. In addition, if you decide to take a crack at starting your own company in the future, a blog gives prospective clients a place to see your expertise in action as they review your proposal. Depending on how often people read your blog, you may even be able to monetize your write-ups and generate a stream of passive income.
Tools and Techniques
These are the tools and techniques that I employed in the setup of my site. As such, I go over each of their roles in the development of my site in the tutorial below.
- Wowchemy
- Hugo
- Netlify
- Version Control
- Markdown
- YAML
Kickoff
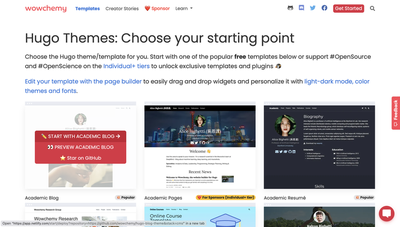
I am a huge fan of convenience, so I accessed a tool called Wowchemy, which performs a significant proportion of the site setup for the developer, including front end, version control, and initial deployment into production. Nonetheless, it is still highly customizable.
To create a blog with Wowchemy with a push of a button, utilize the Academic Blog template in Wowchemy’s Templates page:
Connect Netlify with your GitHub or GitLab account to create a Git repo which will house the code for your site. Give it a name of your choosing, but the default name is “hugo-blog-theme”.
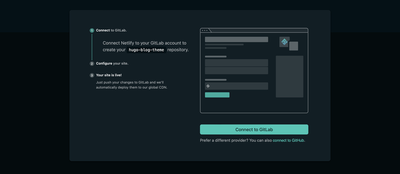
Once you click “Save & Deploy”, you will be directed to your Netlify account (attached to your Git profile), where you will be able to make some particular changes to your site. For example, from Netlify you can customize your domain with either a free or paid name, then secure your site with HTTPS for free, which I strongly recommend you do.
If you go back to your Git account, you will see that there is now a new repository corresponding to your blog. From there, you can clone your repo to your local machine to start customizing your site and writing up blog posts. In the next part of this post, I will guide you through the Hugo syntax which you need to be familiar with in order to customize your blog site to meet your needs.
Charles Varga
Cybersecurity Analyst at Florida Department of Financial Services
I am a cybersecurity professional working for the State of Florida and attending Pace University. My career interests include incident response, cybersecurity automation, pen testing, red teaming, and malware analysis.